


WSL Extensions in VsCode allows Remote Access on Linux for Development.

Prerequisites:
- Download VSCode
- Download Ubuntu from Windows Store
Enabling WSL From Windows Features
First We need to Enable WSL from Windows Feature. We Can Enable this option from Windows Feature or from Powershell.
Step 0 :
First You need to Enable Windows Subsystem for Linux
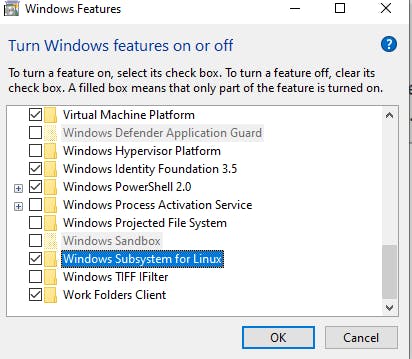
or You can also Enable Windows Subsystem for Linux from Powershell
Enable-WindowsOptionalFeature -Online -FeatureName Microsoft-Windows-Subsystem-Linux

Step 1:
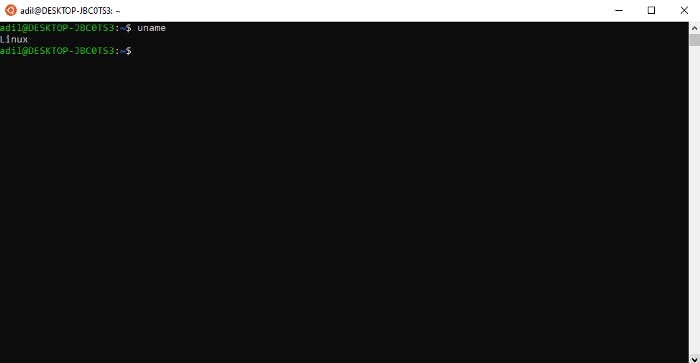
Now we need to check either WSL Is enabled or not from Command Shell Prompt

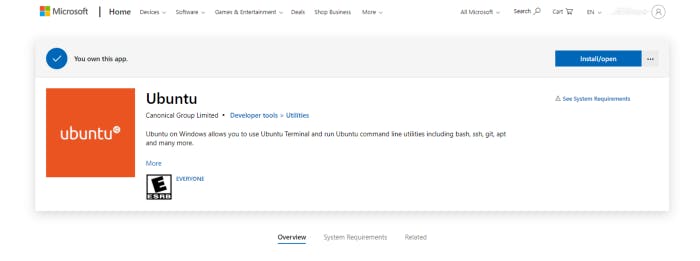
Installing Ubuntu Machine
Step 0:
Go to Microsoft Store and Download Ubuntu
 After Installation is done, Launch the Ubuntu and create a user ID and password since you are setting up a full Linux instance. You are now running Linux on Windows.
Running Ubuntu on VSCode Using WSL Extension
Step 0:
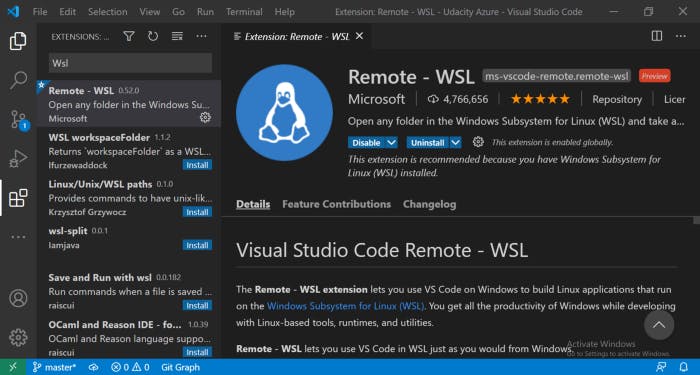
After Installing and Launching the Vscode, Go to the VsCode Market and Search for WSL. Install the following extension as shown in the below Figure
Step 1:
After Installing Remote -WSL we need to configure VsCode With Ubuntu Machine we installed In the Ubuntu Terminal Enter the Code. so we can install all the dependencies required for the WSL Remote Linux Access.
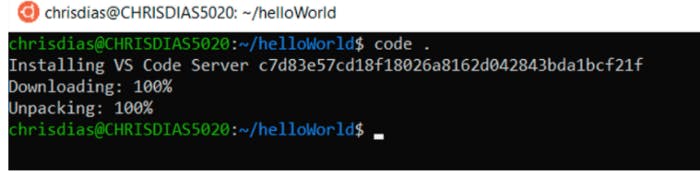
After Installing VS Code Server Go to VsCode and See the following changes
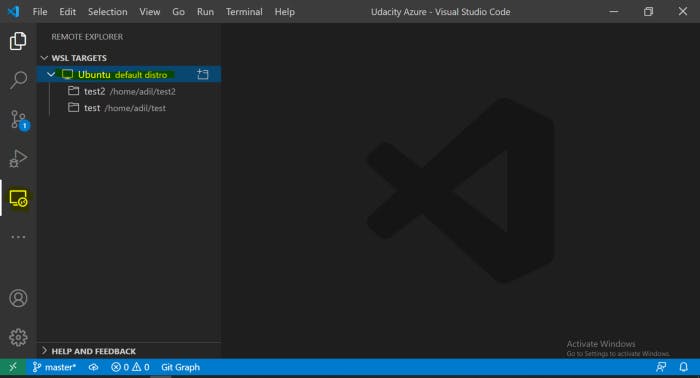 Now Launch the Ubuntu Machine from the Button available on the Right side.
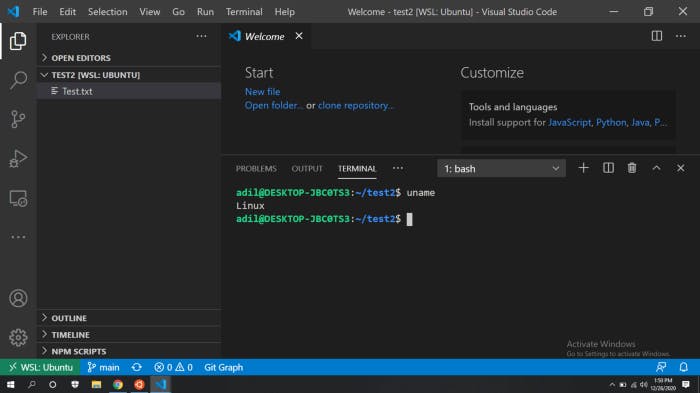
Hurrah! Our WSL Remote Linux Machine is Successfully Installed on Windows. This Machine is faster and smoother and you can access both Windows and Linux at the same time. In the Next Blog, we will learn how to configure SSH with GitHub & Git on Remote Access Linux Machine. If you are facing any kind of problem feel free to reach out on Linkedin.
That's All! See you in the next blog. Cheers:)